
Hey crafty friends! 👋
Today I’m sharing a fun and artsy cardmaking technique that’s perfect for adding a pop of color and a little shine: **Watercolor Lifting**! I used the *Happy Hibiscus* stamp set and some vibrant Stampin’ Write Markers to create this cheerful look—and let me tell you, this one’s a must-try if you love playing with color!
Let’s walk through it step by step, and I’ll show you exactly how I created this project.
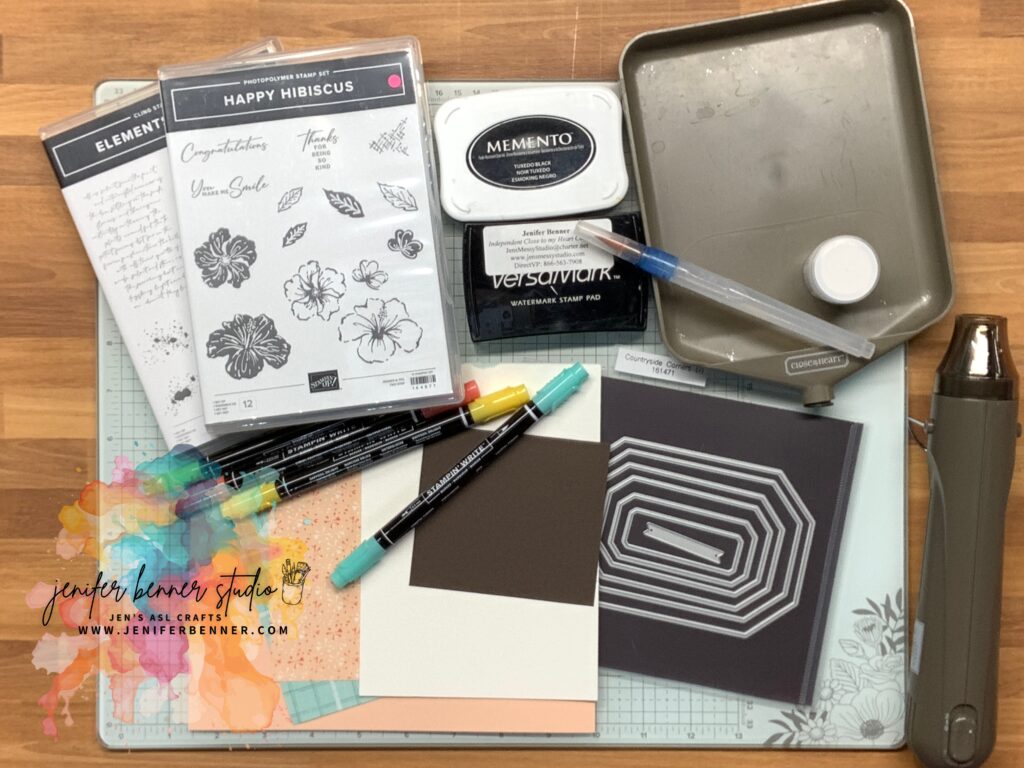
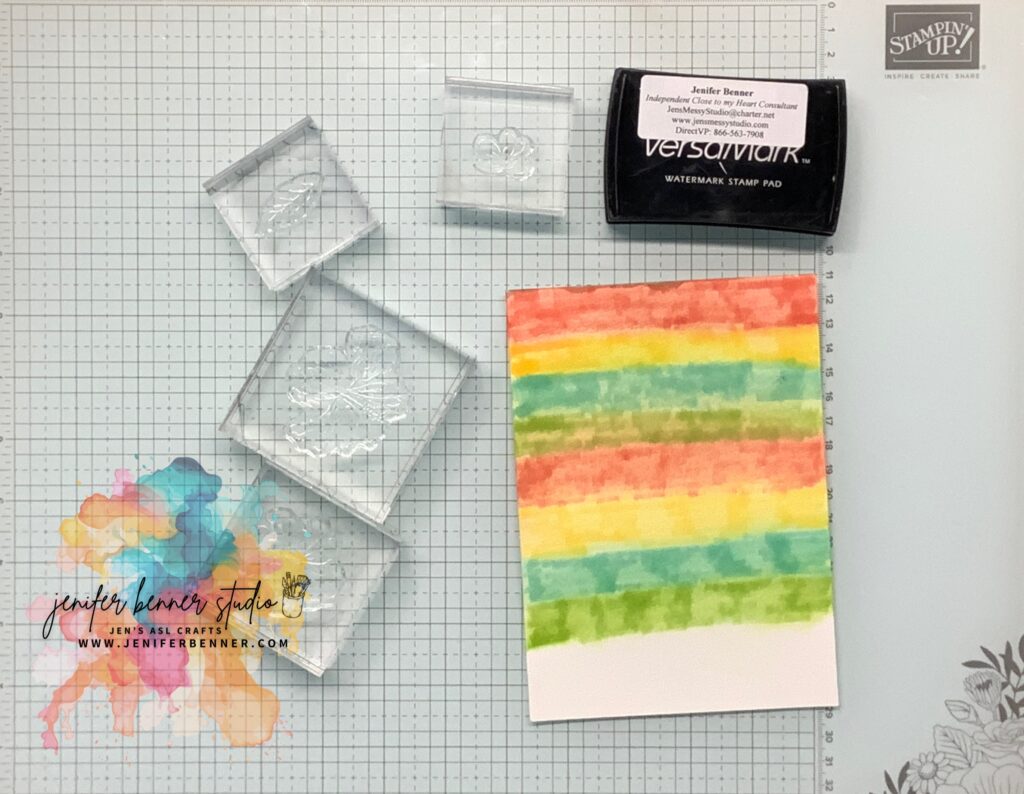
🛠️ Supplies You’ll Need:
– Watercolor paper
-Dye-based markers (I used Stampin’ Write Markers, which are sold in color family sets, not individually
– Solid image stamps (I used *Happy Hibiscus*)
– Versamark Ink
– Craft Heat Tool
– Clear Embossing Powder
– Watercolor brush
– Water
– Cardstock (I used Early Espresso for matting)
– Foam Adhesive Strips
– Ribbon (white, for accent)
– Patterned papers or embellishments of your choice
💡 Inspired by the Splitcoaststampers Challenge
This project was inspired by the Technique Lovers Challenge #TLC1051 on Splitcoaststampers! The theme was Watercolor Lifting, and it gave me the perfect reason to break out my markers and play with color.
If you love getting crafty with a creative prompt, definitely check out their weekly challenges—they’re a great way to stretch your creativity and try something new!
🎨 Let’s Get Crafty!
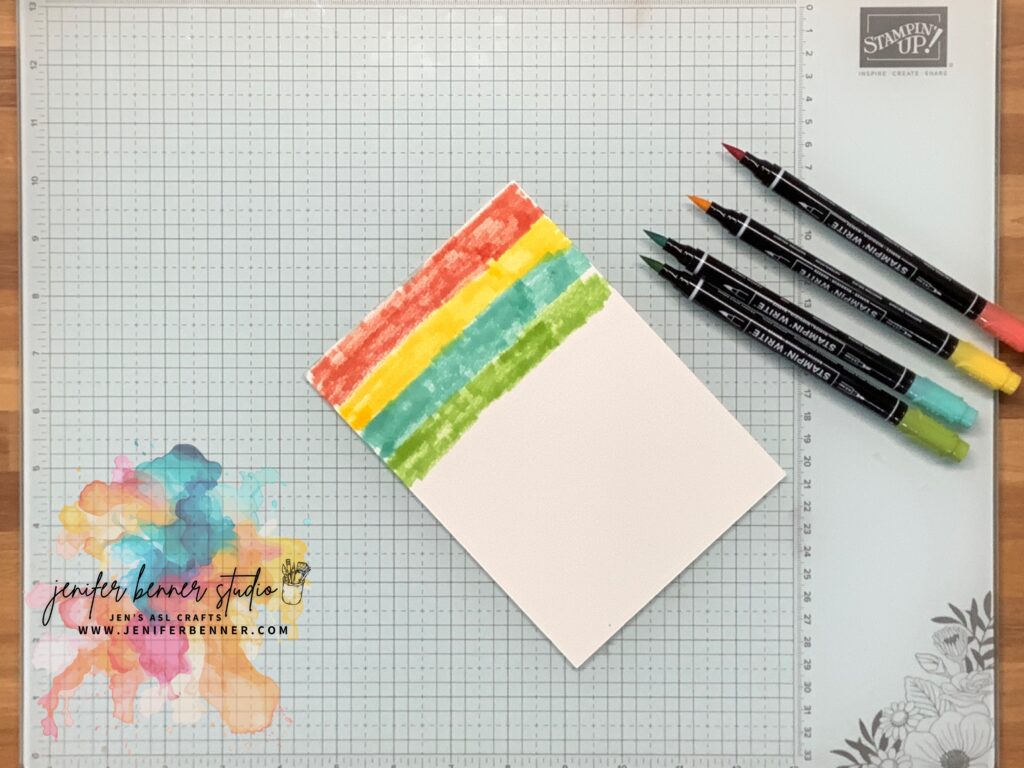
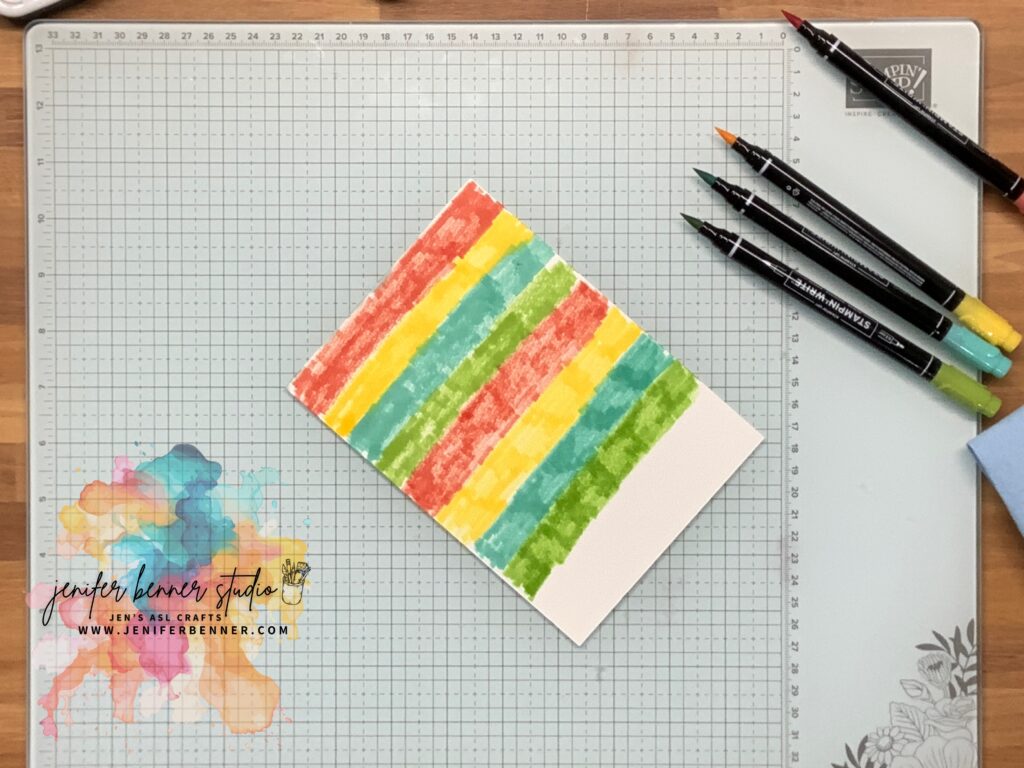
Step 1: Add Your Color
Start by laying down strips of color on your watercolor paper. I used the following color:
Calypso Coral, Granny Apple Green, Daffodil Delight, and Coastal Cabana.
Since these markers are dye-based and water-reactive, they’re perfect for watercolor techniques. Keep in mind—Stampin’ Write Markers are only available in sets, grouped by color families like Brights, Regals, Subtles, etc.
I created a few different color strip patterns and had fun playing around with how they looked!
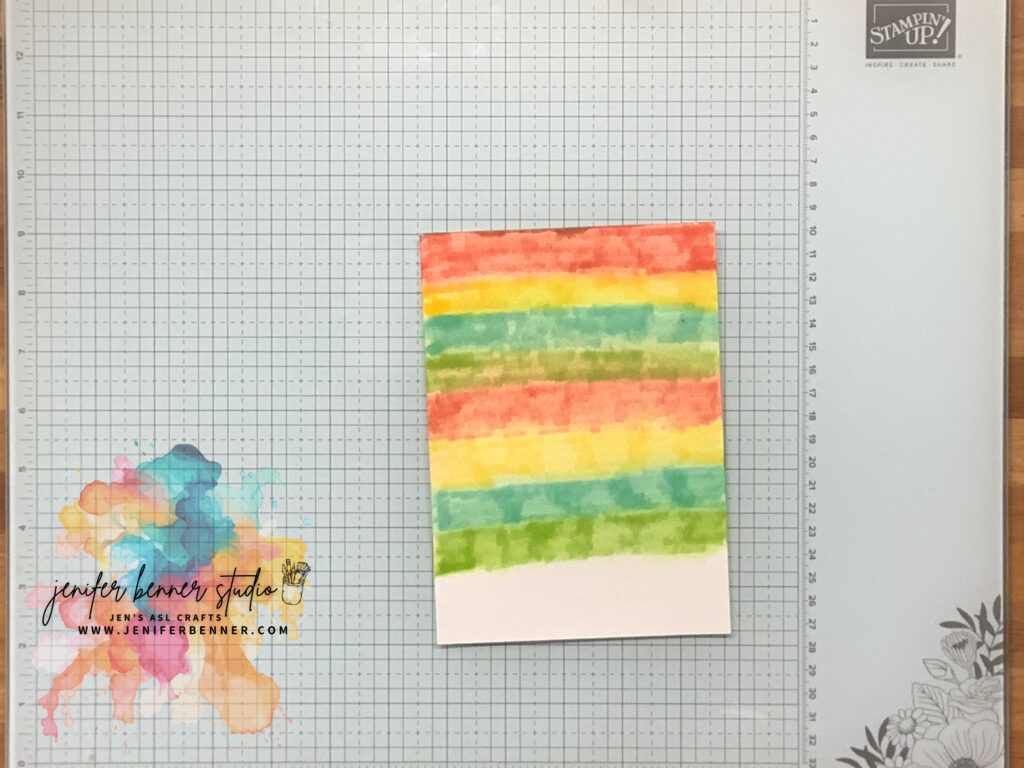
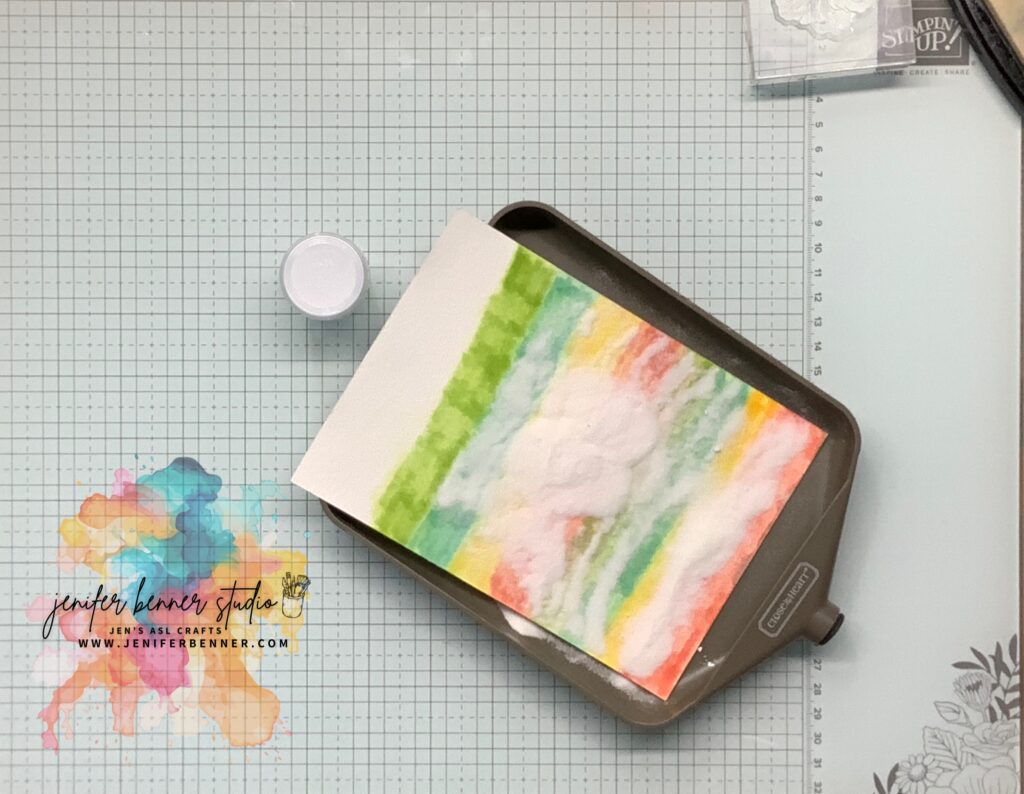
Step 2: Lift the Color
With a damp watercolor brush, gently go over the strips and “lift” the color—this softens the look and gives a dreamy effect. After that, blot the paper gently with a paper towel to soak up any excess, then dry it thoroughly using your craft heat tool.
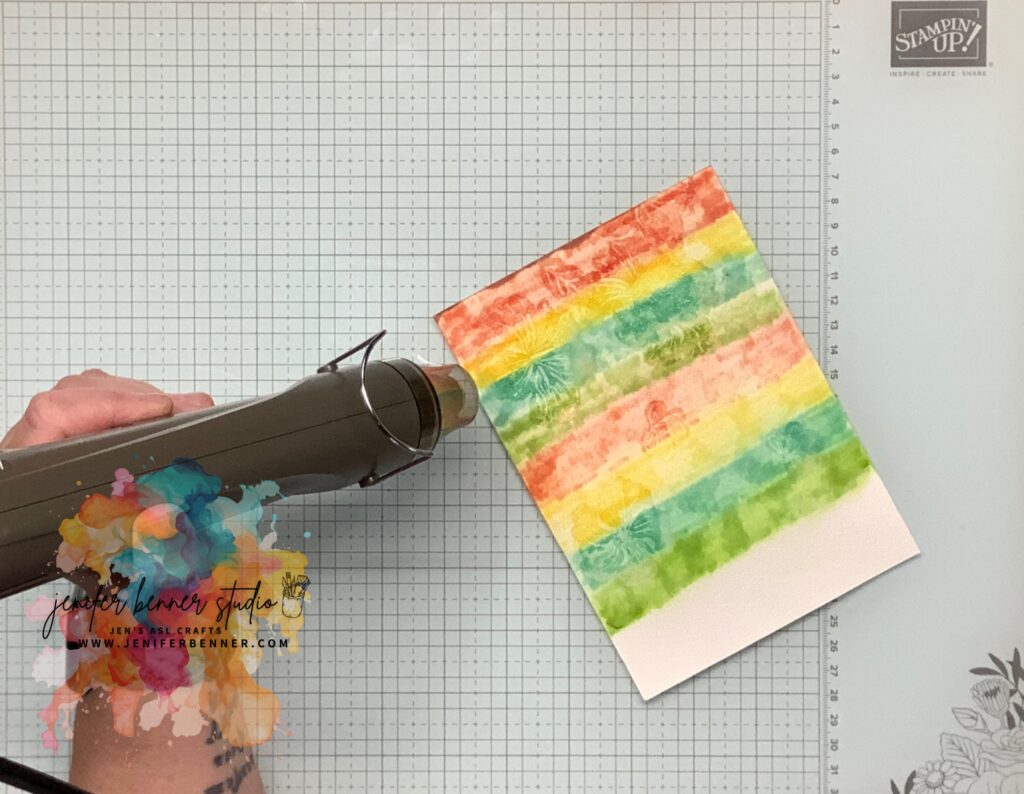
Step 3: Stamp and Emboss
Now it’s time for a little magic! Ink the solid hibiscus images using Versamark Ink, stamp them right over the colored background, then sprinkle on clear embossing powder. Heat it up with your heat tool until everything is melted and shiny. This gives your stamped images a glossy, slightly raised effect.
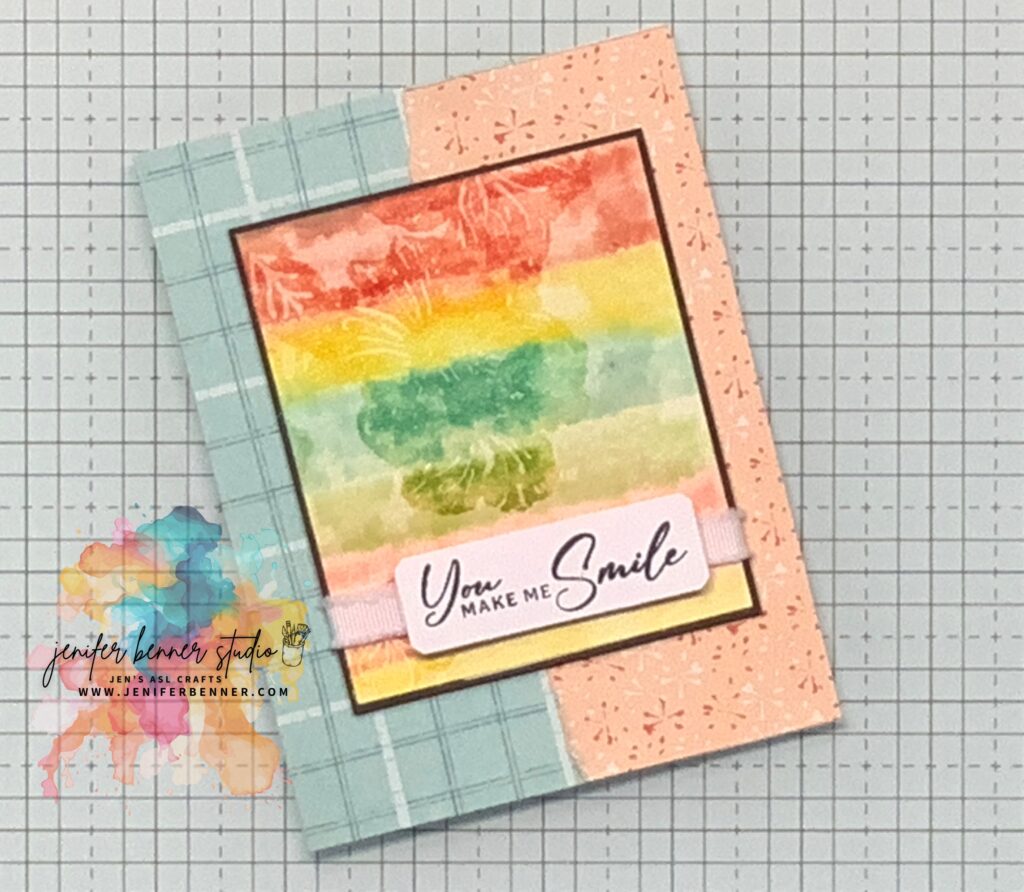
Step 4: Assemble Your Card
trimmed the watercolor panel and matted it on Early Espresso cardstock to really make those colors pop! Before adhering the mat, I wrapped a little white ribbon across it for a soft, finished touch.
Using Foam Adhesive Strips, I popped up the mat and my stamped sentiment label onto the card base to add dimension.
Step 5: Admire the Texture
Take a closer look—you’ll see the stamped hibiscus images subtly glimmering from the embossing, while the background has that beautifully blended watercolor lift. It’s an effect that looks like you worked a lot harder than you actually did. 😉💕

🖨️ Want to Print This Tutorial?
✨ I’ve made it super easy to follow along! You can download the full step-by-step tutorial as a PDF right here:
👉 Click here to download the PDF tutorial
(Perfect to save or print for your next crafty session!)
🌈 Try These Color Combos Next:
– Polished Pink + Pale Papaya + Mango Melody
– Night of Navy + Pool Party + Highland Heather
– Real Red + Pumpkin Pie + Crushed Curry
Every combo gives a whole new vibe!
💬 Final Thoughts
This technique is such a fun way to get more out of your solid image stamps—and it’s perfect for birthdays, thank-yous, or just because.
✨ Every card turns out a little different, and that’s part of the magic.
If you give this technique a try, don’t forget to tag me or comment below—I’d LOVE to see what you create!
Happy stamping and watercolor lifting!
**💛 Jen**
P.S. Shout-out to #TLC1051 for sparking this colorful creation!