
Hey crafty friends! 👋
Welcome to Technique Tuesday—where we explore a new crafty technique together each week, this space is for YOU! 💖
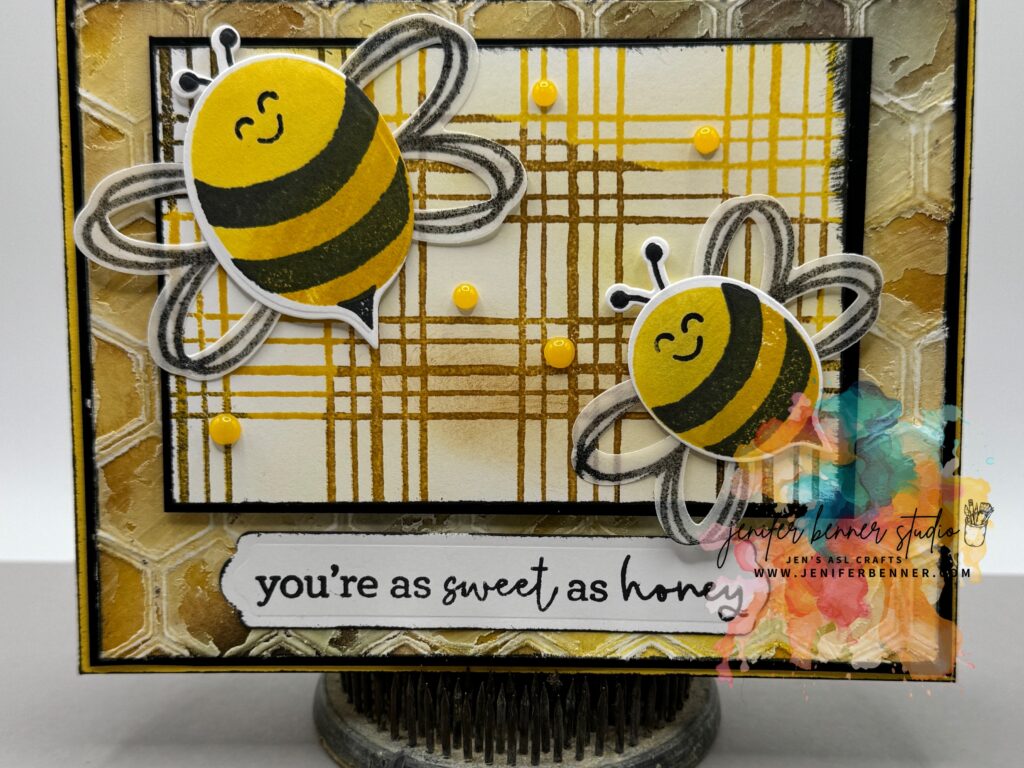
Today’s featured technique is called “Stretch Your Cover-Plate”. This one’s all about layers, texture, blending, and adding real dimension to your background. And yes—there’s a bee! 🐝
(Originally inspired by the SplitcoastStampers #TLC1041 challenge!)
This technique is all about layering, texture, and giving your die-cuts or embossing folders a whole new vibe. We’re blending, distressing, heat drying, and popping up some beautiful bee-themed goodness.
✂️ What You’ll Learn:
-
How to create a layered, distressed background with embossing folders
-
Using ink blending for a rich honey-gold color palette
-
Adding embossing paste for texture
-
Crafting a cute little bee with vellum wings 🐝

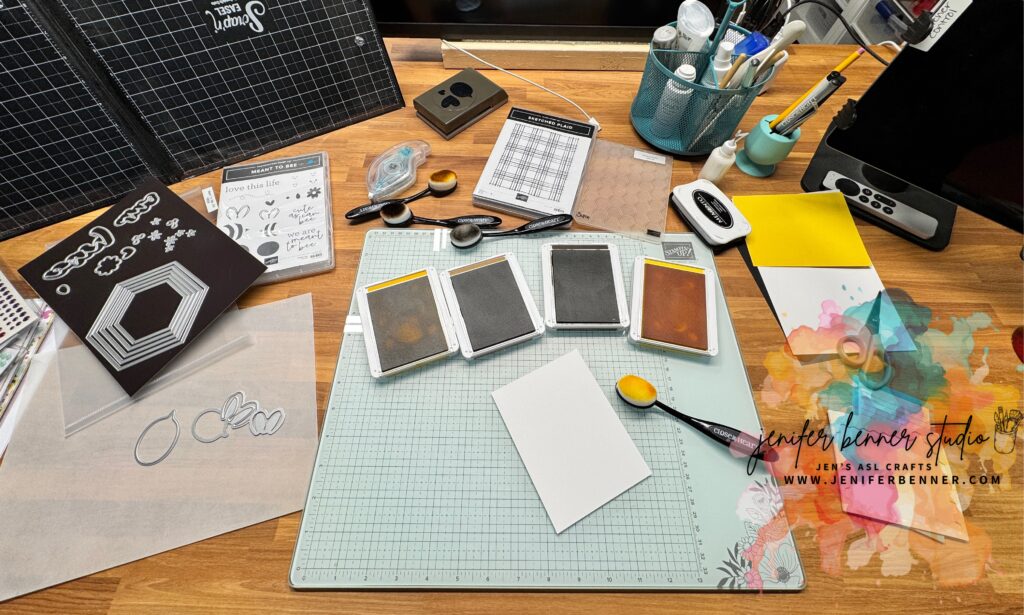
🧰 Supplies You’ll Need:
- Blending brushes
- Inks: Daffodil Delight, Crushed Curry, Pecan Pie, Early Espresso
- Basic White, Basic Black, and Daffodil Delight cardstock
- Embossing folder (Honeycomb or your favorite)
- Embossing paste + palette knife
- Die-cut machine
- Sandpaper or foam block
- Stampin’ Dimensionals
- Your favorite bee stamp or die-cut
📦 Looking for tools? Check my Amazon Craft Tools Page for studio favorites!
This technique is called Stretch Your Cover-Plate (#TLC1041 and that came from the SplitCoastStampers!
🌻 Measurements:
- Base Card (Basic White): 5-1/2″ x 8-1/2″ (scored at 4-1/4″)
- Mat #1 (Daffodil Delight): 5-1/2″ x 4-1/4″
- Mat #2 (Basic Black): 5-3/8″ x 4-1/4″
- Mat #3 (Basic White – Textured): 5-3/16″ x 4″
- Mat #4 (Basic Black): 4-1/4″ x 2-7/8″
- Mat #5 (Basic White): 4-1/8″ x 2-3/4″
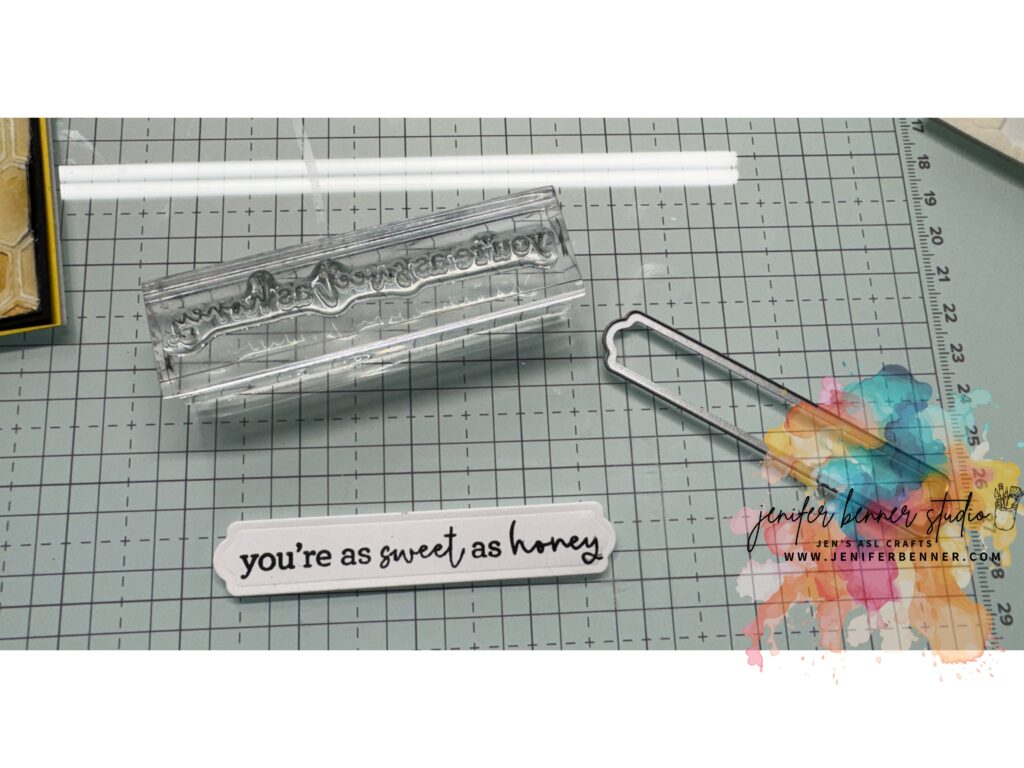
- Label: Any label shape you prefer (used: Beautiful Butterflies DieCut)
Note: The Honeycomb Embossing Folder and Vellum are RETIRED. Swap with your favorite texture folder or medium!
📌 Supplies:
- Die-cutting machine (your choice)
- Embossing folder (your choice)
- Blending brushes
- Inks: Daffodil Delight, Crushed Curry, Pecan Pie, Early Espresso, Tuxedo Black Memento
- Background stamp (sketched plaid or similar)
- Embossing paste + palette knife
- Masking Tape (I used the Purple Tape)
- Craft Heat gun
- Sandpaper or foam distressing block (or even can use the fine grit nail buffer!)
- Green glue (it is actually called the multi-purpose adhesive but I called it the green glue because of the tips)
- Seal Adhesives (or your choice)
- Stampin’ Dimensionals
- Foam Strip
🛒 Additional tools not provided by my main craft supplier can be found on my Amazon Storefront – be sure to check there!
🌈 Instructions:
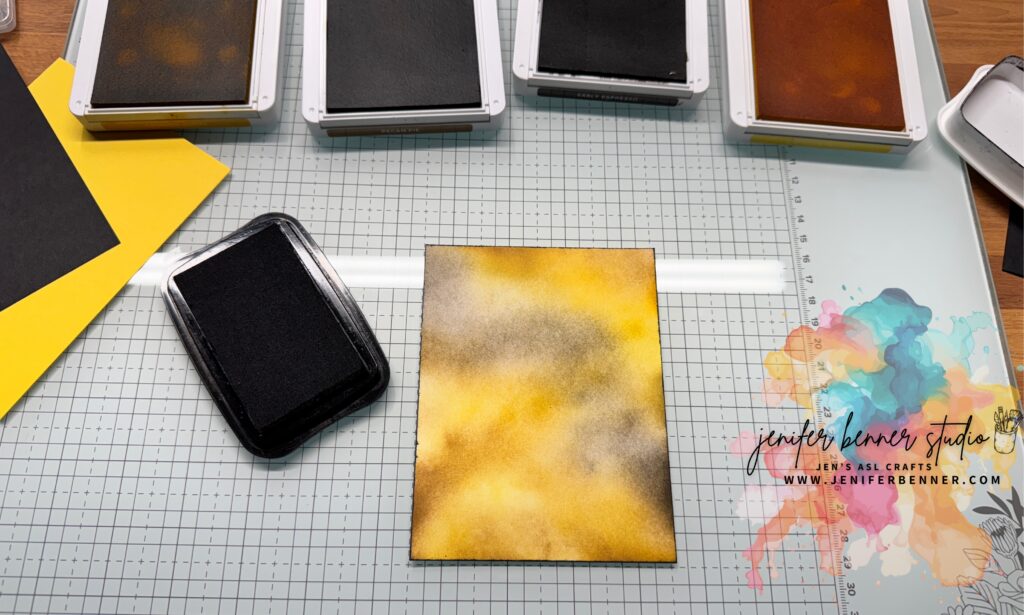
Ink Edges: Distress ink the edges of ALL mats and your label using Tuxedo Black Memento ink.
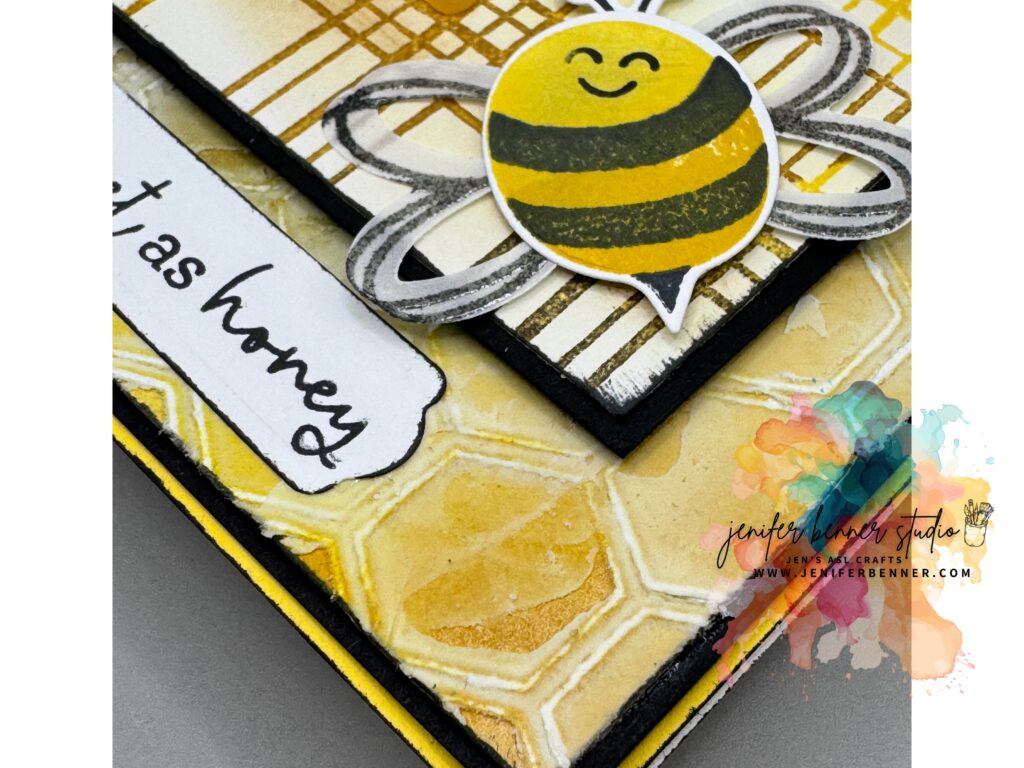
Ink Blending: With blending brushes, softly blend Daffodil Delight, Crushed Curry, Pecan Pie, and Early Espresso on Mat #3 to your liking.
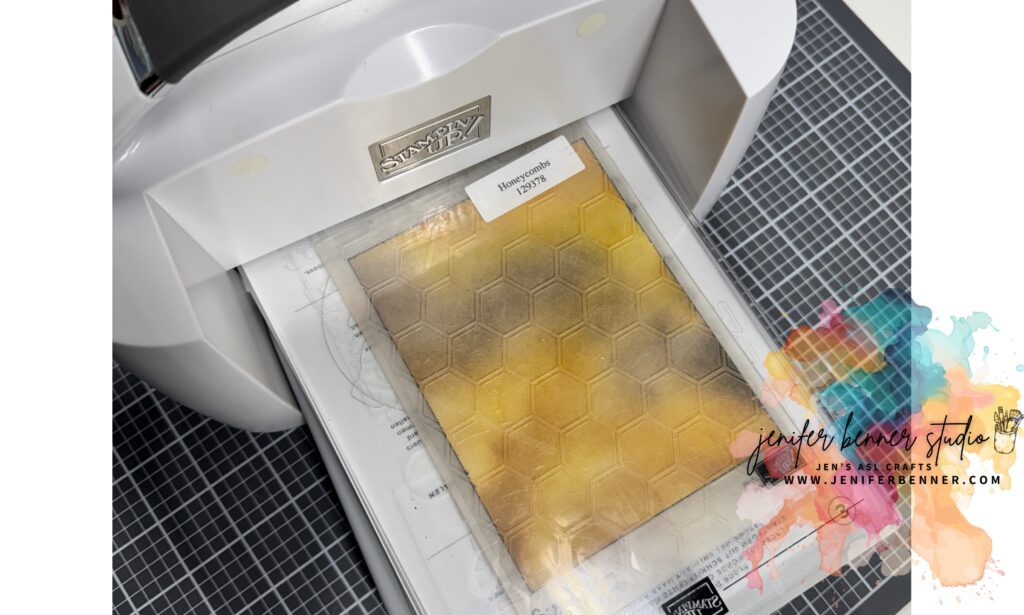
Texture Time: Emboss Mat #3 (Basic White) using the Honeycomb EF (or alternate EF).
Distress for Depth: Use sandpaper or foam block to gently reveal the white core on Mat #3.

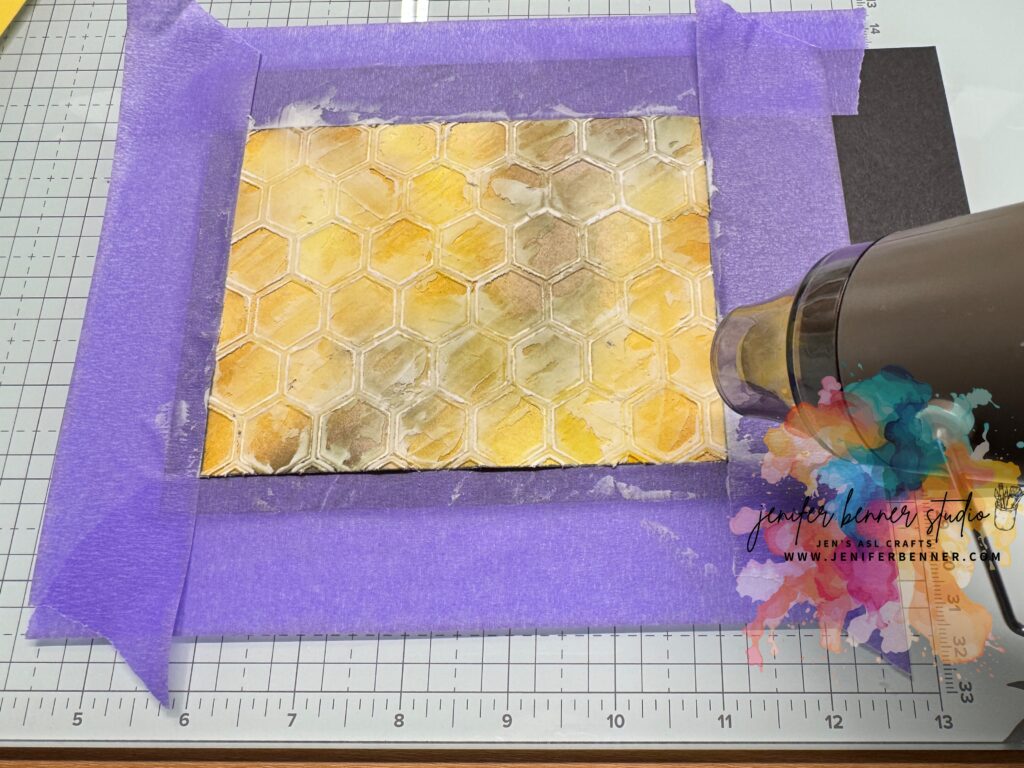
Add Texture Paste: Tape Mat #3 down and apply embossing paste with a palette knife—add thick and thin areas for visual interest. Dry completely with a craft heat gun.

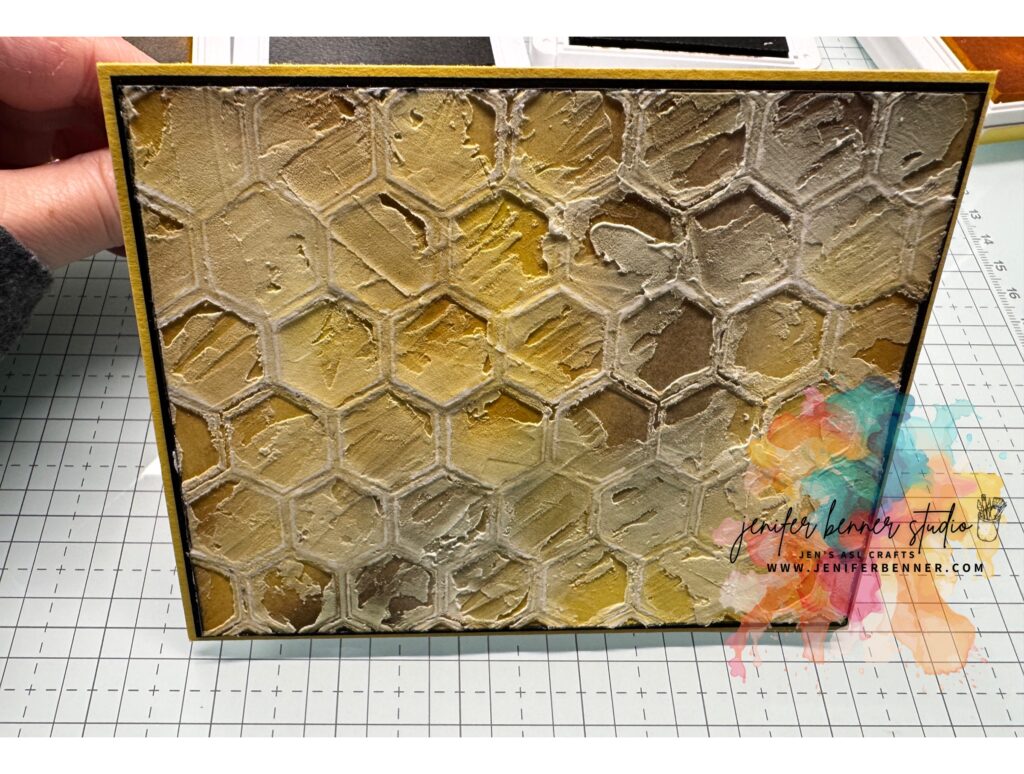
Layer it Up: Adhere Mat #3 to Mat #2 (Basic Black).
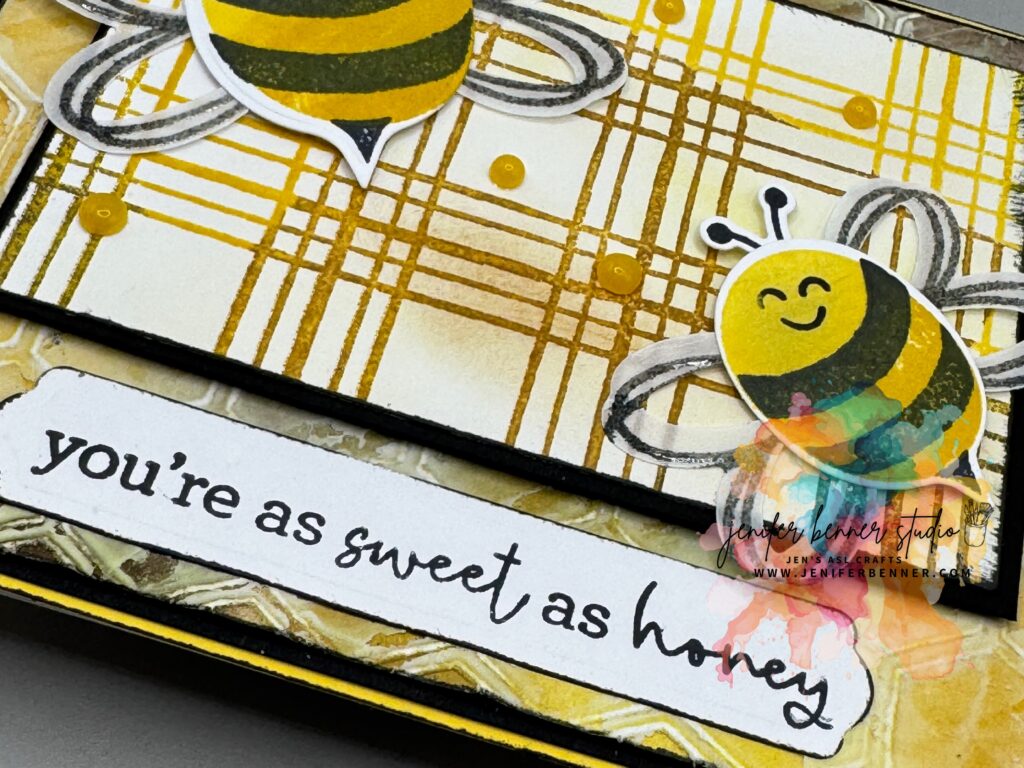
Stamp Background: Use your background stamp and favorite ink on Mat #5.
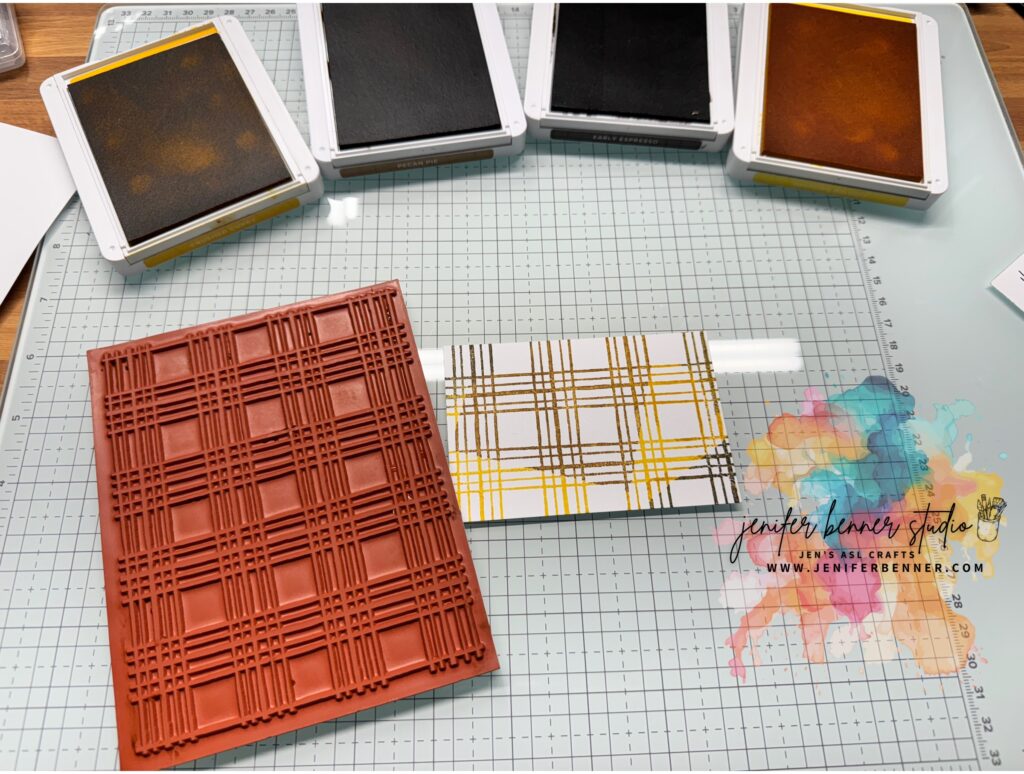
Blend Again: Mute the white of Mat #5 using soft ink blending.
Mount Layers: Attach Mat #5 to Mat #4 (Basic Black).
Pop It Up: Use Stampin’ Dimensionals and foam strips to pop Mat #4 up on top of the textured Mat #3.
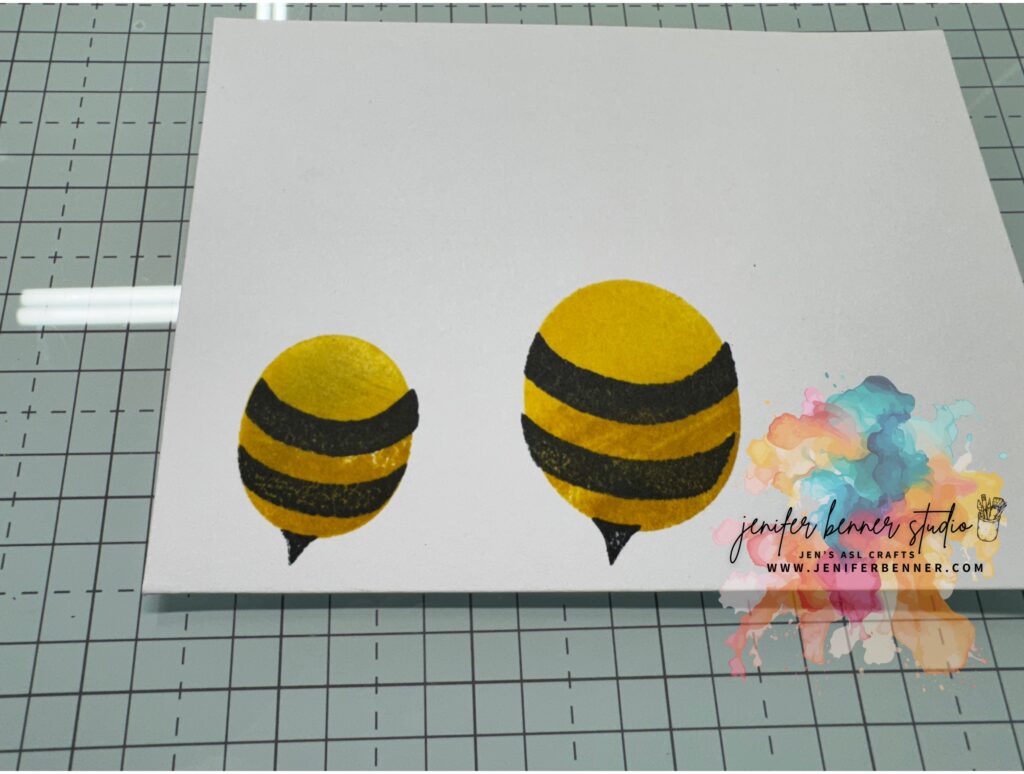
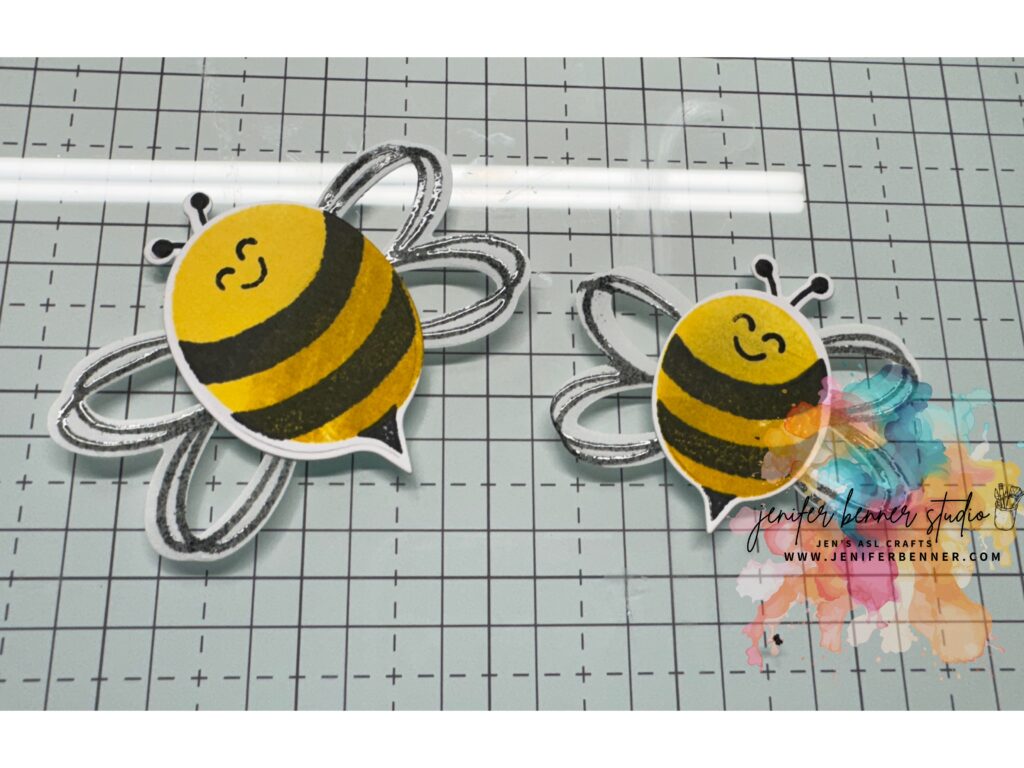
Bee Time! Stamp the bee body using Daffodil Delight & Crushed Curry. Use Tuxedo Black for stripes and the smiley face.
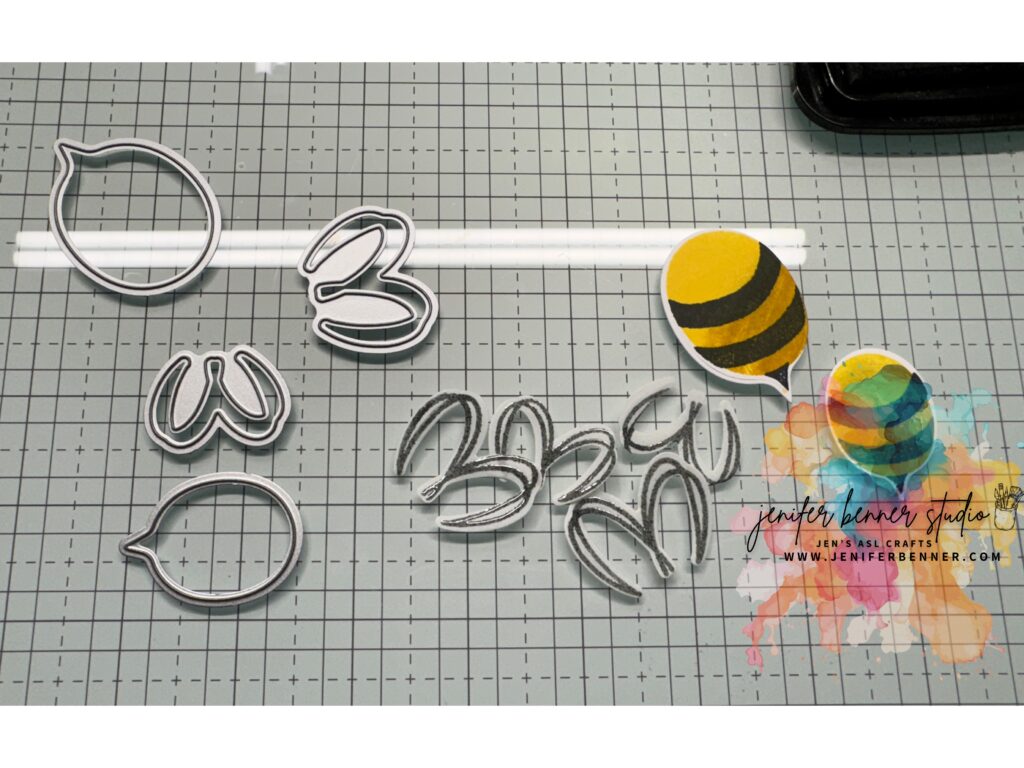
Wings: Stamp wings on vellum or scrap cardstock. Fussy cut if needed or use the die cut.
Assemble the Bee: Attach wings and head using green glue. Pop the body onto Mat #5 with Dimensionals.
Sentiment Label: Stamp your sentiment in Tuxedo Black on your chosen label shape.
Final Touch: Adhere the label to the front of the textured background. Done!
Note: The Honeycomb Embossing Folder and Vellum are RETIRED. Swap with your favorite texture folder or medium!
🛒 Additional tools not provided by my main craft supplier can be found on my Amazon Storefront – be sure to check there!
📄 Want the PDF Instructions?
Download your FREE tutorial sheet to follow along, print out, or save to your craft binder:
🟣 Download the PDF Tutorial Sheet
You can find everything in the Tutorial Lab here—including supply list and step-by-step instructions.
💬 Let’s Craft Together!
I’d love to see how you use this technique!
Tag me on social: @jeniferbennerstudio
Or leave a comment below if you tried it—I’d bee so happy to see your buzz-worthy creations! 🐝✨
Until next time…
Keep crafting with your hands and your heart. 💖
—Jen